Duckling Assisted Hatching Guide
Assisted hatching is a topic that generates different opinions.
On the one hand, you will hear that a chick or duckling that requires assistance to hatch is weak. On the other hand, artificial incubation means sometimes things are not exactly as nature intended*, and this may lead to an inherently healthy chick or duckling failing to hatch. (Sometimes you will assist a duckling that isn't healthy. However, it is my experience that despite the assist these ducklings do not survive.)
The other factor is that if you get assistance wrong you are likely to kill the chick or duckling you are trying to save.
I have hatched many Call ducks, which are notoriously difficult to hatch, so am accustomed to assisting and, through trial and error, I've fine tuned an approach that gives our ducklings the best chance.
*The very best way to hatch is under a reliable broody. For hatching ducklings a chicken is as good as a duck, although I don't think this works the other way around! Even using a broody for just the first seven days of incubation (which are the most crucial for development) can make all the difference.
Below is a guide to when and how we assist with hatching at Applebrook Ducks.
How to safely assist your duckling to hatch – step by step instructions
1) Monitor pipping
From experience the most crucial point for assistance is a duckling that has inner pipped but is unable to outer pip (this could be for a number of different reasons). If a duckling that fails to outer pip is not assisted (by the creation of a safety hole) it will suffocate in shell.
You should expect a duckling that has inner pipped to outer pip within 24 hours — if it hasn't done so you should assist and outer pip for it.
You can tell if a duckling has inner pipped by candling (you should see its beak moving in the air cell). Sometimes ducklings push at the membrane prior to inner pip and create shadows in the air cell, so if you are unsure whether your duckling has inner pipped or not put the egg to your ear — if it has inner pipped you will hear the duckling moving.
2) Create a safety hole
Place your safety hole through the shell to the air cell. I try and place it as close to the tip of the duckling's beak as possible (whilst making sure there is no chance of being too close and damaging the beak). I use an old compass from a school geometry set (pictured below) as it's sharp enough to easily go through the shell but its design means it has an effective 'stop' — so it won't accidently go too far into the egg and damage the duckling. I have also heard of tweezers being used.
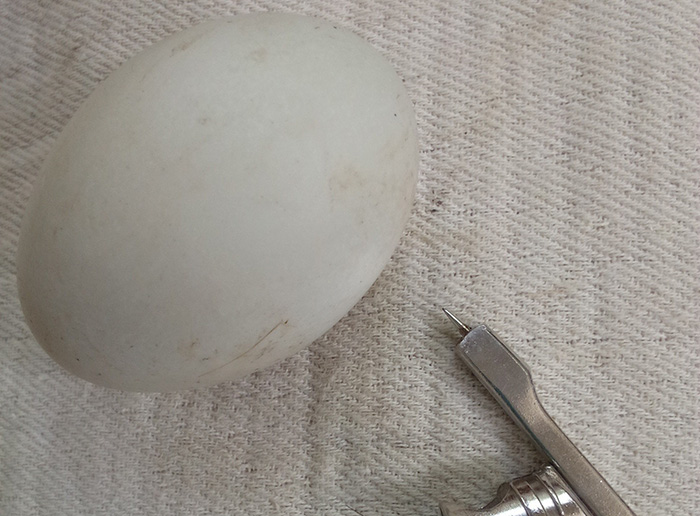
I place the safety hole close to the tip of the duckling's beak for two reasons: it is important to ensure your safety hole is not close to the membrane as if you rupture the membrane it will bleed (and your duckling may hemorrhage), but also because on the one occasion I placed the hole further from the beak (to ensure I didn't accidently damage it...) the duckling shifted in its shell — blocking the safety hole and suffocating.
3) Wait to see if your duckling requires further assistance
Once your duckling has air you can place it back in the incubator and wait. A duckling that has required assistance to outer pip is likely to require further assistance to hatch, but I always wait another 24 hours (so 48 hours from inner pip) before doing anything further. I expect ducklings to take forty eight hours from inner pip to hatch, although it may take longer.
4) If required, carefully remove the shell that covers the air cell
After waiting for 24 hours (48 hours from inner pip) you can proceed to very carefully and slowly remove the shell that covers the air cell. Leave a margin where the air cell meets the membrane as if you accidentally break the membrane (which is very delicate), and your duckling is not ready to hatch, it will bleed. The membrane will probably look white and papery.
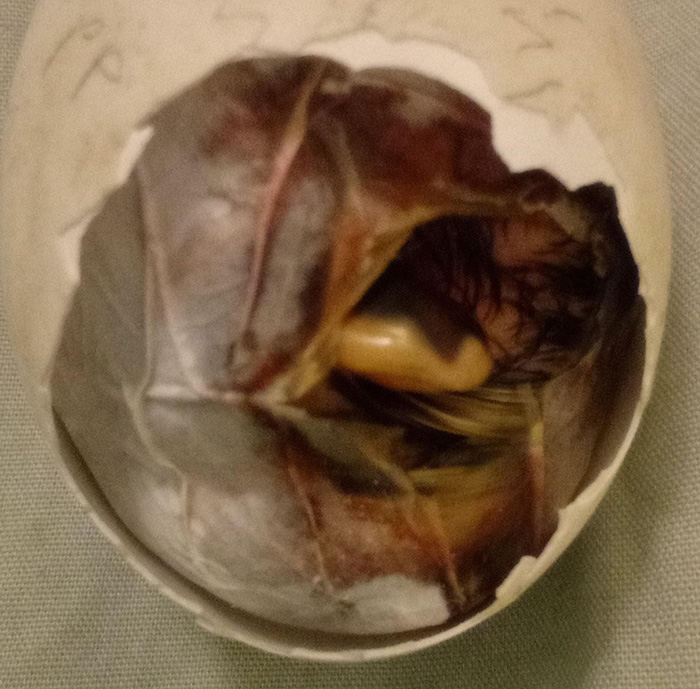
5) Check for blood in the membrane
At this stage you can check whether it is time to proceed by moistening the membrane to make it translucent. (I use a cotton bud moistened with cooled boiled water — ensure you don't get water in the duckling's nostrils). If you can see any blood in the blood vessels in the membrane your duckling is not ready to hatch — so put it back in the incubator for a few hours (see image below).
6) If there is no blood in the membrane, proceed to carefully remove more of the shell
Once you can see no blood in the membrane you can very carefully, a tiny bit at a time, start to remove more of the shell. If the membrane has dried and stuck to the duckling you can gently moisten it with a cotton bud (I continue to use cool boiled water) to unstick it. If you see any fresh blood your duckling is not ready — so put it back in the incubator and try again later.
From experience I've found that the area with visible blood shown in the photo below — where the duckling should push itself out of the egg as it hatches — often still has blood in the membrane after the blood has drained from the area around the duckling's head and beak. For this reason I remove the shell from here very carefully. At the sign of any blood put your duckling back in the incubator. If you rush removing the shell not only will your duckling bleed but if too much of the shell is removed too soon your duckling may spill out of the egg and hatch before it is ready.

If your duckling hatches too soon you risk hemorrhage as the blood supply through the membrane may not have shut down. You also risk an egg yolk that is not fully absorbed which, unfortunately, is likely to lead to the death of the duckling. Ducklings require the nutrients from their absorbed egg yolks at the start of their lives but an unabsorbed egg yolk may also cause infection and, even if your duckling survives hatch, this will likely lead to it dying within a few days.
Assisting if your duckling has outer pipped but failed to unzip
If your duckling has outer pipped by itself but it is 48 hours since inner pip and it has not proceeded to unzip you can carefully remove the shell over the air cell and proceed as above. If your duckling has started to unzip but appears to have stopped making progress you may also need to assist.
The key takeaway from the above is that the hatching process takes time, and once you know your duckling has an air supply when it requires it you must not rush.
When appropriately assisted most ducklings will push themselves out of their eggs when they are ready — as they would for a normal hatch.
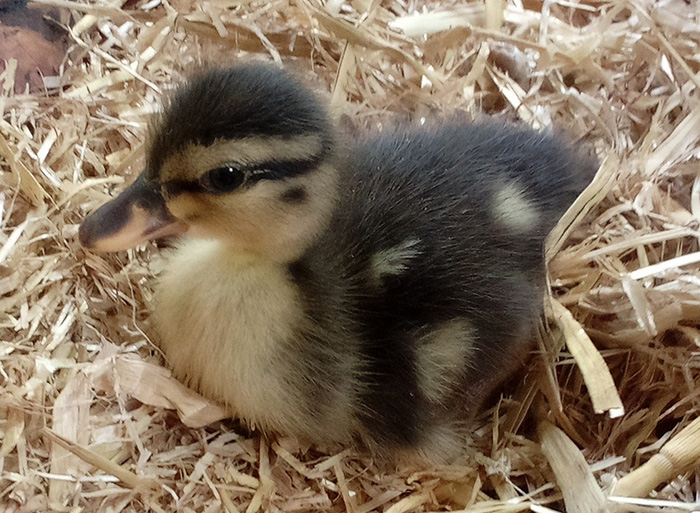
Below is a photo of one the ducklings shown in its egg above, at seven days old.
Comments
Be the first to leave a comment